
I absolutely love sharing this Canning Thai Coconut Squash Soup Recipe with friends and family because it perfectly captures that vibrant, comforting blend of creamy coconut and bright Thai flavors combined with the sweet earthiness of winter squash. For me, it’s one of those recipes that feels both exotic and homey at the same time—ideal for cozy days but surprising enough to impress guests. Plus, knowing that you can preserve it through canning makes it a total game-changer for enjoying this soup year-round without hassle.
Why You’ll Love This Canning Thai Coconut Squash Soup Recipe
What excites me most about this recipe is the incredible flavor profile. The butternut squash or kabocha provides a naturally sweet, buttery base while the lemongrass, ginger, and Thai chiles add that perfect zing and depth. The coconut milk, added at serving time, rounds everything out with a silky, luscious creaminess that just melts in your mouth. I love how every spoonful delivers a wonderful balance between sweet, spicy, and citrusy notes that feel bright and fresh yet soothing.
Beyond the taste, what makes this recipe stand out for me is how straightforward it is to prepare, yet feels absolutely special. The canning process might sound intimidating at first, but it’s honestly quite manageable with some basic gear, and it rewards you with a shelf-stable soup that you can pull out anytime for a quick, gourmet-style meal. I find it perfect for making in big batches to serve at family dinners, casual gatherings, or even holiday meals—plus, it stores beautifully so you can skip the cooking when life gets busy.
Ingredients You’ll Need
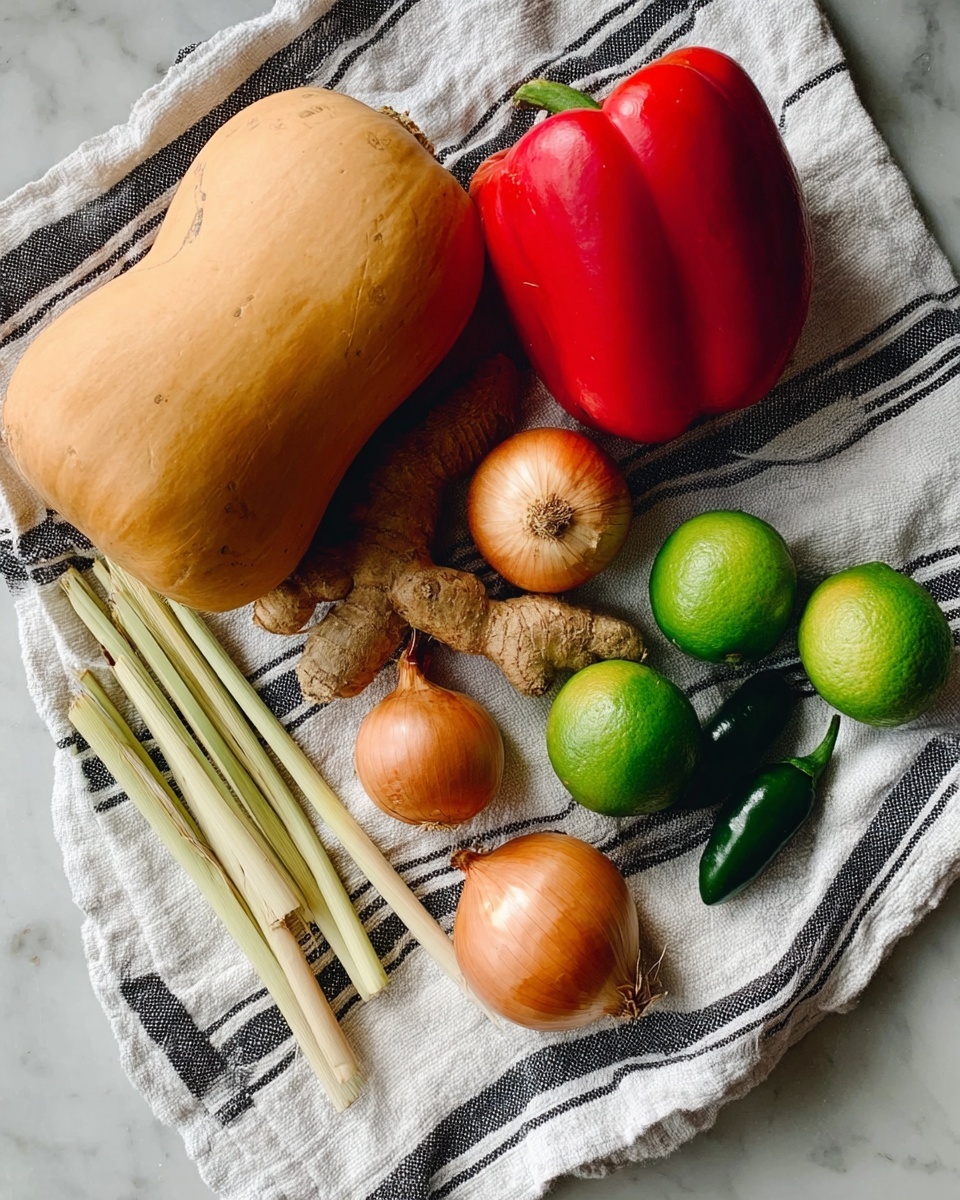
These ingredients are simple but each one packs a punch in flavor or texture. The choice of squash is important since it’s the base; the aromatics like lemongrass and ginger build that authentic Thai flavor, and the chiles give just the right amount of heat to enliven the dish.
- 2 Quarts vegetable or chicken broth: This forms the flavorful liquid foundation and can be chosen to keep it vegetarian or add extra richness.
- 1 ½ lb winter squash: Butternut, kabocha, or acorn all work wonderfully and bring natural sweetness and creaminess when cooked down.
- ½ tsp red pepper flakes: Adds gentle heat and warmth throughout the soup.
- 2 small Thai chile peppers, minced: These fresh or dried chiles pack authentic Thai spice and complexity.
- 3 cloves garlic, minced: Garlic deepens the flavor and adds savory aroma.
- 1 stalk lemongrass, quartered: Offers a fragrant citrusy note that makes this soup uniquely Thai.
- 2 inch piece fresh ginger, peeled and grated: Ginger brings warmth and a zesty bite.
- 2 tbsp sugar: Balances the spice and tartness, highlighting the squash’s sweetness.
- 1 tsp lime zest: Adds bright citrus oils that lift the whole soup.
- 1 medium red bell pepper, chopped: Contributes sweetness and vibrant color.
- 4 medium shallots, chopped: Shallots introduce a subtle onion sweetness and texture.
- 2 tsp salt: Essential to bring out all the layered flavors.
- 2 tbsp lime juice: Fresh lime juice adds acidity to balance the richness beautifully.
- Serving add-ins per pint: Red onion slivers, chopped cilantro, coconut milk, and lime wedges for vibrant topping and garnishing.
Directions
Step 1: Begin by bringing your vegetable or chicken broth to a boil in a large, six-quart Dutch oven. Stir in the red pepper flakes, minced garlic, Thai chiles, grated ginger, and lemongrass stalk. Let this mixture simmer gently for about 20 minutes, stirring often so that the aromatics infuse the broth well.
Step 2: After 20 minutes, remove the lemongrass stalk from the broth. Then add the cubed squash, sugar, salt, lime zest, lime juice, chopped shallots, and red bell pepper. Bring the soup back to a boil, then reduce the heat to low and let it simmer uncovered for five minutes, stirring occasionally to soften the vegetables without breaking them down completely.
Step 3: While the soup simmers, prepare your jars for canning. Ladle the hot soup into sterilized jars, leaving about an inch of headspace at the top. Use a bubble removal tool or a spatula to release any trapped air bubbles for a perfect seal.
Step 4: Wipe the rims clean with a clean rag to ensure no food residue prevents sealing. Place the lids and screw bands on the jars, tightening them until they are fingertip tight—not too tight, but securely closed.
Step 5: Place the filled jars on a rack inside your pressure canner with about two inches of simmering water. Work in batches if needed until all jars are processed. Lock the lid, vent steam for 10 minutes, then apply your weighted or dial gauge and bring the pressure up to 10-11 lbs.
Step 6: Process pint jars for 75 minutes and quarts for 90 minutes at this pressure. When done, turn off the heat and let the pressure return to zero naturally. Wait another five minutes before carefully removing the lid.
Step 7: Let the jars cool inside the canner for 10 minutes, then transfer them to a cooled surface to finish cooling for about 12 hours. Check seals, label your jars, and store in a cool, dark place for up to a year.
Step 8: To serve, pour the soup into a medium saucepan and bring to a boil over high heat. For each pint, stir in ½ cup coconut milk, 2 tablespoons red onion slivers, and 1 tablespoon chopped cilantro. Simmer gently for a couple of minutes to blend the flavors.
Step 9: Ladle the soup into bowls and serve with fresh lime wedges. Enjoy the complex, comforting flavors with every spoonful!
Servings and Timing
This recipe yields approximately 4 to 6 servings, depending on portion size. Prep time is about 20 minutes to chop and prepare ingredients. The simmering and canning steps combined take roughly 2 hours, including the pressure canning time. After cooking, cooling the jars for proper sealing requires around 12 hours of resting time. Overall, I recommend setting aside a full afternoon if you plan to make and can a batch in one go!
How to Serve This Canning Thai Coconut Squash Soup Recipe
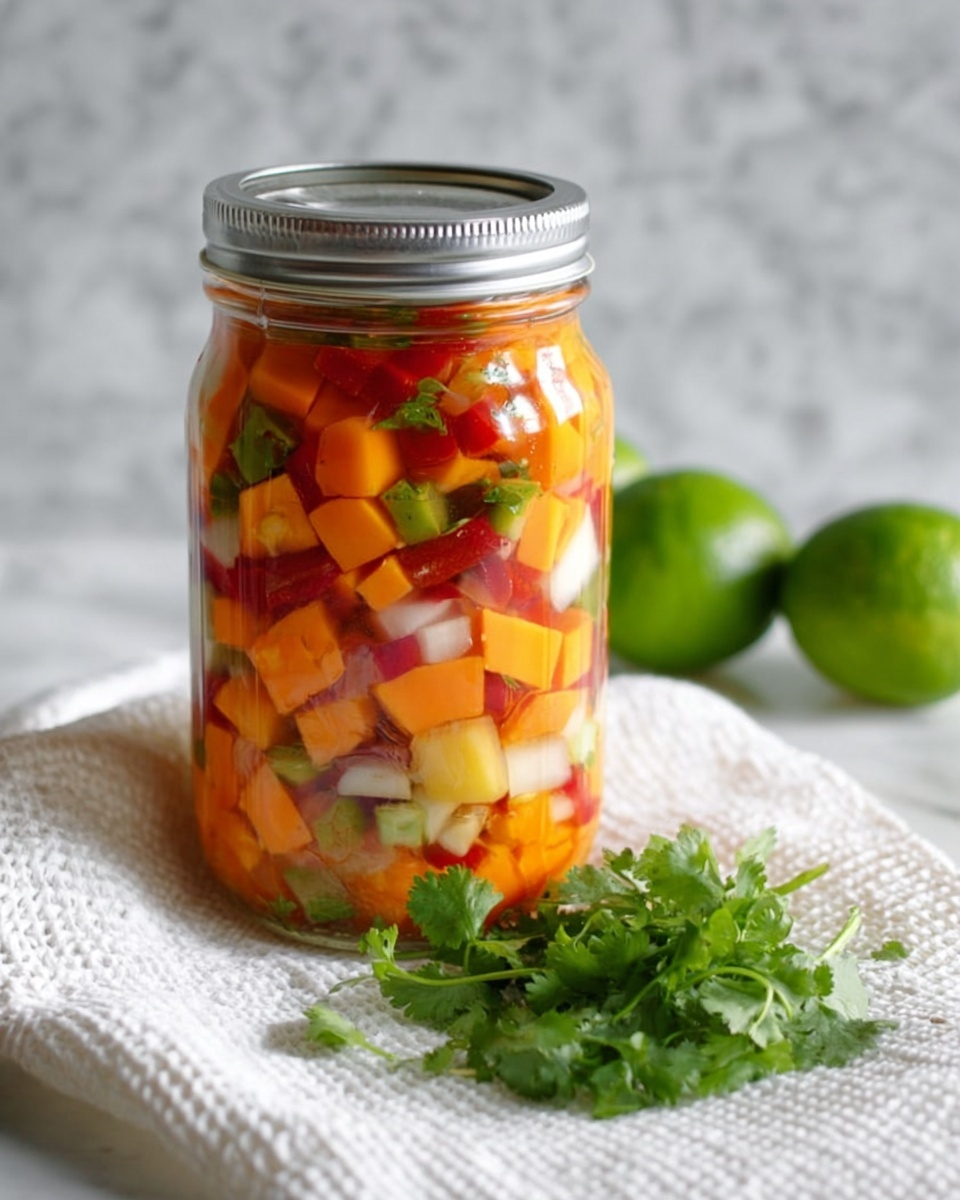
I like to serve this soup piping hot, straight from the stovetop after warming it through. The creamy coconut milk stirred in just before serving adds luscious silkiness that makes each bowl feel indulgent yet nourishing. It pairs beautifully with simple jasmine rice or a side of crusty bread that soaks up the flavorful broth perfectly.
For garnishing, I’m a big fan of adding fresh cilantro and thin slivers of red onion for a bright, herbal pop along with a squeeze of lime to add zesty brightness right at the table. Presentation is nice when served in deep, colorful bowls to contrast the warm orange soup color. For a party or holiday meal, you could serve individual bowls garnished with edible flowers or a sprinkle of toasted coconut flakes to impress your guests.
This soup also pairs wonderfully with light, crisp white wines like a dry Riesling or Sauvignon Blanc, or non-alcoholic options like chilled coconut water or sparkling limeade. It’s versatile enough for weekday dinners but elegant enough to star on special occasions, making it one of my go-to recipes whenever I want something that feels thoughtfully prepared but not complicated.
Variations
One of the things I love about this Canning Thai Coconut Squash Soup Recipe is how adaptable it is. If you prefer a vegan dish, simply use vegetable broth and stick with the plant-based ingredients. For a gluten-free version, just ensure your broth ingredients contain no gluten additives. I’ve also experimented with swapping the butternut squash for acorn or kabocha squash depending on what I find freshest; each brings a slightly different sweetness and texture.
For a bit more heat, I sometimes add extra Thai chile peppers or a splash of fish sauce for an umami boost—though fish sauce is optional and not necessary if you want to keep it vegetarian. If you’re short on time or want to avoid canning, making a smaller batch and freezing individual portions works well, too, though fresh soup has a different, brighter flavor than frozen.
For different cooking methods, you could roast the squash first to caramelize its natural sugars before simmering it in the broth for extra depth. I’ve also blended the soup to a silky smooth texture for a velvety finish, which is perfect for those who prefer creamier soups without chunks. Experimenting with a swirl of chili oil on top or toasted sesame seeds can add an exciting twist as well.
Storage and Reheating
Storing Leftovers
Once opened, I keep the soup in airtight containers in the refrigerator and eat it within 3 to 4 days for the best quality. Using glass containers with tight-fitting lids helps retain the soup’s flavor and freshness. Before sealing your jars for canning, make sure everything is very clean and dry to avoid spoilage.
Freezing
This soup freezes very well if you want to skip canning or save extra servings. I let it cool completely before transferring to freezer-safe bags or containers, leaving some space for expansion. Frozen soup stays good for up to 3 months. When ready to enjoy, thaw overnight in the fridge for best results.
Reheating
To reheat, I gently warm the soup over medium heat on the stove, stirring occasionally to prevent burning. Avoid microwaving too aggressively as it can affect texture and cause uneven heating. I add a splash of coconut milk during reheating if it has thickened too much, which helps restore that lovely creaminess and fresh flavor.
FAQs
Can I use other types of squash for this recipe?
Absolutely! While butternut squash is classic here, kabocha and acorn squash both work beautifully. Just make sure to adjust the cooking time slightly if your squash varies in density or sweetness. Each type lends a unique character, making it fun to experiment.
Is this soup suitable for canning beginners?
Yes, I believe this recipe is approachable for beginners with some careful attention to the canning instructions. Using a pressure canner is important for safety, and following the recommended processing times ensures a good seal and long storage life. Taking your time and preparing everything properly will build your confidence.
Can I make this soup without canning and just refrigerate it?
Definitely! You can prepare the soup and store it in the fridge for up to 4 days. If you want to keep it longer, freezing is a great alternative. Just be sure to add the coconut milk fresh when reheating to preserve the flavor and texture.
What can I serve with this soup to make a complete meal?
I love serving this soup with steamed jasmine rice or a warm, crusty baguette. A simple green salad with a tangy vinaigrette or some grilled shrimp or tofu on the side makes it a balanced and satisfying meal. It also goes well with light stir-fried vegetables for added texture.
How spicy is this soup and can I adjust the heat?
The heat level is moderate, balanced by sweetness and creaminess. If you prefer milder soup, reduce or omit the Thai chiles and red pepper flakes. For more kick, add additional chiles or a drizzle of chili oil at serving. It’s very easy to customize to your spice preference.
Conclusion
I hope you feel inspired to try this Canning Thai Coconut Squash Soup Recipe soon because it truly is one of my favorite dishes to make and share. The way it combines exotic Thai flavors with wholesome ingredients, plus the convenience of canning it for anytime enjoyment, makes it a winner in my kitchen. Give it a go, and I promise it will become a treasured staple in your recipe collection just like it is in mine!
PrintCanning Thai Coconut Squash Soup Recipe

This Canning Thai Coconut Squash Soup is a vibrant and flavorful winter soup that combines sweet squash, spicy Thai chiles, and aromatic lemongrass, finished with fresh lime and creamy coconut milk. Perfect for preserving and enjoying year-round, this tested recipe uses pressure canning to safely store the soup. Ideal for a comforting meal with a hint of Thai-inspired warmth and zest.
- Prep Time: 20 minutes
- Cook Time: 2 hours 10 minutes
- Total Time: 2 hours 30 minutes
- Yield: Approximately 6 pints or 3 quarts
- Category: Soup
- Method: Instant Pot
- Cuisine: Thai
- Diet: Gluten Free
Ingredients
Soup Base
- 2 Quart vegetable broth, or chicken broth
- 1 ½ lb butternut squash, or kabocha, acorn, or other orange-fleshed winter squash, peeled and cut into ½” (1cm) cubes
- ½ tsp red pepper flakes
- 2 small Thai chile peppers, seeded and minced, fresh or dried
- 3 cloves garlic, minced
- 1 stalk lemongrass, quartered
- 1 piece ginger, fresh 2 inch (5 cm), peeled and grated
- 2 tbsp sugar
- 1 tsp lime zest
- 1 medium red bell pepper, chopped
- 4 medium shallots, chopped
- 2 tsp salt
- 2 tbsp lime juice, ideally fresh, but bottled works too
Serving Add-Ins Per Pint
- 2 tbsp red onion slivers
- 1 tbsp cilantro, chopped
- ½ cup coconut milk
- Lime wedges
Instructions
- Flavor the Broth: Bring the broth to a boil in a six-quart (six-liter) Dutch oven. Stir in the red pepper flakes, minced garlic, seeded and minced Thai chiles, grated ginger, and quartered lemongrass stalk. Simmer for 20 minutes, stirring often to blend the flavors.
- Add Vegetables and Seasonings: Remove the lemongrass from the broth, then add the cubed squash, sugar, salt, lime zest, lime juice, chopped shallots, and chopped red bell pepper. Return to a boil, then reduce heat to maintain a simmer uncovered for 5 minutes, stirring occasionally.
- Prepare Jars for Canning: Ladle the hot soup into hot sterilized jars, leaving 1 inch (2.5 cm) of headspace. Remove air bubbles using a bubble removal tool, then wipe jar rims clean with a clean rag to ensure a proper seal.
- Seal Jars: Place lids and bands on the jars and tighten until fingertip tight. Repeat filling and sealing for all jars.
- Pressure Canning: Place jars on a rack inside a pressure canner containing 2 inches (5 cm) of simmering water. Lock the lid on the canner. Heat to medium-high and vent steam for 10 minutes. Put the weighted gauge or counterweight on the vent, then build pressure to 10 lbs for weighted-gauge or 11 lbs for dial-gauge canners.
- Process Jars: Process pint jars for 75 minutes and quart jars for 90 minutes. Once processing is complete, turn off the heat and allow the pressure to return to zero naturally. After that, wait an additional 5 minutes before opening the lid.
- Cool Jars: Let the jars cool in the canner for 10 minutes, then remove them carefully and place on a towel or rack to cool completely for about 12 hours. Check seals, label jars, and store in a cool, dark place for up to one year.
- Reheat and Serve: To serve, pour the contents of a jar into a medium stainless steel pan and bring to a boil over high heat. For each pint, stir in ½ cup (125 ml) coconut milk, 2 tbsp red onion slivers, and 1 tbsp chopped fresh cilantro; double these amounts for quarts.
- Final Simmer: Bring the soup with add-ins to a simmer and cook for 1-2 minutes until heated through.
- Serve: Serve immediately with fresh lime wedges on the side for squeezing, adding bright acidity to the dish.
Notes
- When serving, Ball canning suggests adding 2 tbsp red onion slivers, 1 tbsp chopped cilantro, and ½ cup coconut milk per pint of soup for optimal flavor and creaminess.
- Double the serving add-ins quantities if using quart jars.
- Ensure jars and lids are properly sterilized before filling to guarantee safe storage.
- Always follow safety guidelines for pressure canning to avoid foodborne illnesses.
- Use fresh lime juice if possible for best flavor, but bottled lime juice also works.
- This recipe freezes well as an alternative to canning, if preferred.


