I absolutely adore sharing my favorite indulgence with friends, so let me tell you about this Cookie Dough Whoopie Pies: Easy & Delicious Chocolate Filled Treats Recipe. These delightful little sandwiches blend rich, moist chocolate cakes with the irresistible, creamy charm of eggless cookie dough filling. Whenever I make these, I’m instantly transported back to cozy afternoons filled with sweet bites and laughter. They’re simple to whip up but make a show-stopping addition to any dessert tray or casual get-together.
Why You’ll Love This Cookie Dough Whoopie Pies: Easy & Delicious Chocolate Filled Treats Recipe
From the very first bite, I’m always blown away by the flavor combination in this Cookie Dough Whoopie Pies: Easy & Delicious Chocolate Filled Treats Recipe. The deep, slightly bitter cocoa in the cake perfectly balances the sweet, buttery cookie dough with those pops of mini chocolate chips throughout. It’s a multi-textured delight that’s soft, rich, and surprisingly refreshing despite its indulgence. I love that it’s not just chocolate overload but a playful fusion that satisfies every craving without feeling one-dimensional.
What really makes me keep coming back to this recipe is how straightforward it is to prepare. The ingredients are pantry staples, nothing fancy, yet the result feels like a bakery-level treat. Baking whoopie cakes at 400°F is fast, and the cookie dough filling comes together in no time without eggs, so I feel completely confident serving it to guests of all ages. These treats shine at family dinners, birthday parties, or simply as a comforting homemade snack. Their fun presentation as sandwich-style pies also makes them ideal for packing up and sharing, which I always get excited about.
Ingredients You’ll Need
Every ingredient in this recipe plays an essential role in creating the perfect balance of flavor, texture, and color. Whether it’s the richness of butter or the punch of cocoa, each component contributes to these whoopie pies’ irresistible charm.
- All-purpose flour: The base that gives structure and softness to both cakes and cookie dough filling.
- Unsweetened cocoa powder: Adds deep, chocolatey richness to the cakes without overpowering sweetness.
- Baking soda: Helps the cakes rise to a tender, fluffy texture.
- Salt: Balances sweetness and enhances flavor depth.
- Unsalted butter: Provides creaminess and richness; room temperature butter creams best with sugars.
- Granulated sugar: Sweetens and helps create a light, airy cake and filling.
- Brown sugar: Adds moisture and a slight caramel note to the cookie dough filling.
- Eggs: Bind and enrich the cake batter perfectly.
- Buttermilk: Adds tanginess and tenderness making the cakes soft and flavorful.
- Vanilla extract: Enhances all flavors with its warm, inviting aroma.
- Milk: Moistens the cookie dough filling for a silky texture.
- Mini chocolate chips: Offer bursts of melty chocolate in the cookie dough filling for added fun.
Directions
Step 1: Preheat your oven to 400°F (200°C) and prepare two baking sheets by lining them with parchment paper or silicone mats. This keeps the whoopie cakes perfectly round and prevents sticking.
Step 2: In a large bowl, whisk together the flour, cocoa powder, baking soda, and salt. This dry mixture ensures even distribution of rising agents and chocolate flavor throughout the cakes.
Step 3: Using a stand mixer, beat the room-temperature butter with granulated and brown sugars on medium-high speed for about 3 minutes, until the mixture becomes light and fluffy. This creates a soft, airy base.
Step 4: Add eggs one at a time, mixing well after each addition. Then incorporate the buttermilk and vanilla extract until everything is fully combined and smooth.
Step 5: Gradually add the dry ingredients to the wet mixture on low speed. Mix just until no dry spots remain. This prevents overmixing which can toughen the cakes.
Step 6: Using a 1.5 tablespoon scoop, drop about 12 even mounds of batter onto each baking sheet. Level off the scoop for consistency in size, which helps the cakes bake evenly.
Step 7: Bake for about 8 minutes, rotating the baking sheets halfway for uniform browning. The tops should feel set but soft when touched. Avoid overbaking to keep cakes tender.
Step 8: Let the cakes cool on their sheets for 10 minutes before transferring them to wire racks to cool completely. Work in batches if needed, allowing baking sheets to cool between rounds.
Step 9: While the cakes cool, prepare the filling. Beat room-temperature butter with both sugars until light and fluffy, about 3 minutes.
Step 10: Mix in milk and vanilla extract until fully combined, then slowly add flour on medium speed until smooth and creamy. If the filling is too thick for piping, add 1-2 tablespoons more milk.
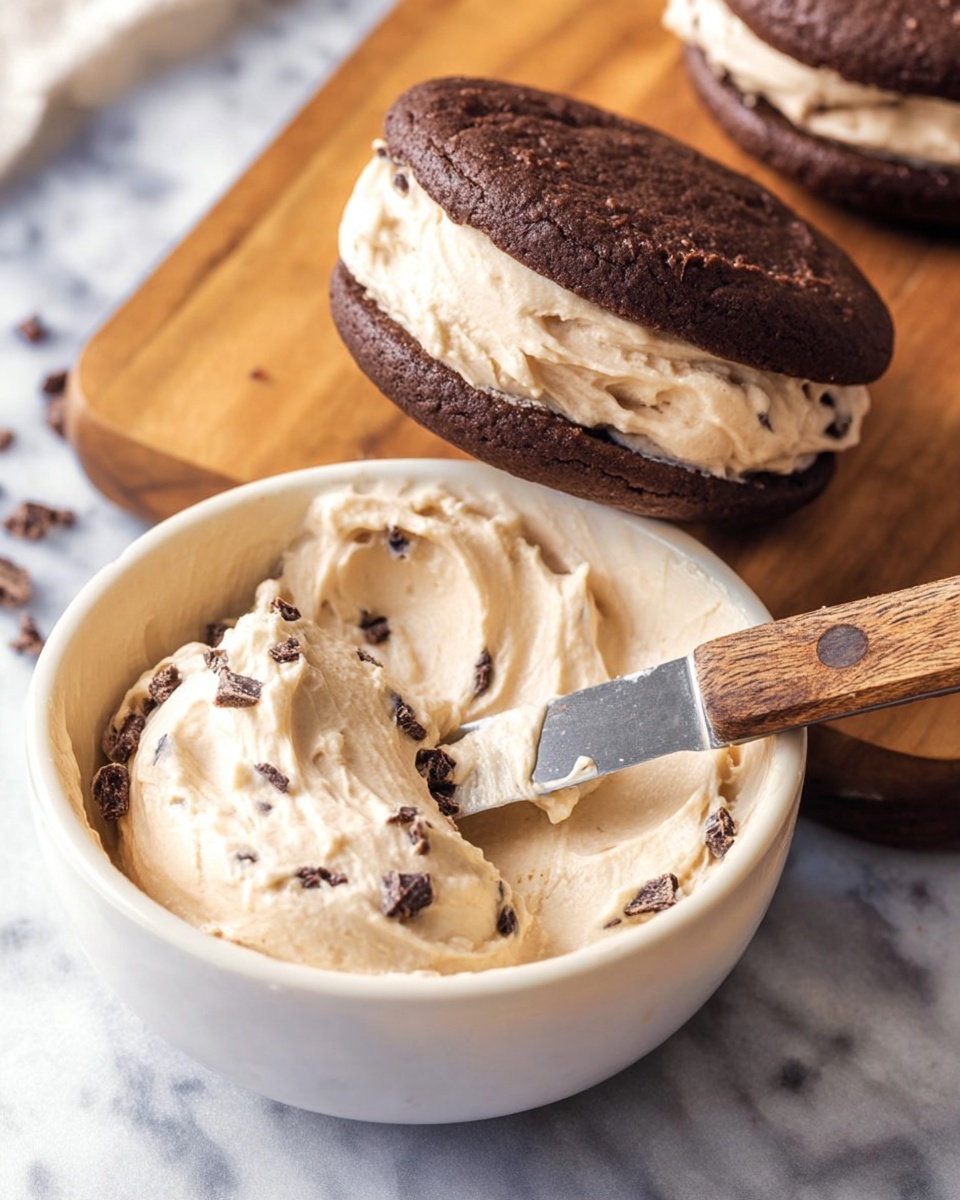
Step 11: Gently fold in the mini chocolate chips to add sweet crunch and chocolate bursts throughout the filling.
Step 12: Match up similarly sized cakes and spread about 2 tablespoons of filling onto one half using a spoon or piping bag. Sandwich with the matching half and press gently to seal.
Step 13: Serve fresh or store in an airtight container at room temperature. I love enjoying them within 3 days to enjoy the fresh, creamy filling and soft cakes at their best.
Servings and Timing
This recipe makes approximately 24 whoopie pies, perfect for sharing at parties or dessert tables. The prep time is about 20 minutes, while baking takes around 8 minutes per batch plus cooling time. Overall, you’re looking at roughly 1 hour total, including assembling and resting. I recommend allowing at least 30 minutes for the cakes to cool fully before filling to prevent melting the cookie dough.
How to Serve This Cookie Dough Whoopie Pies: Easy & Delicious Chocolate Filled Treats Recipe
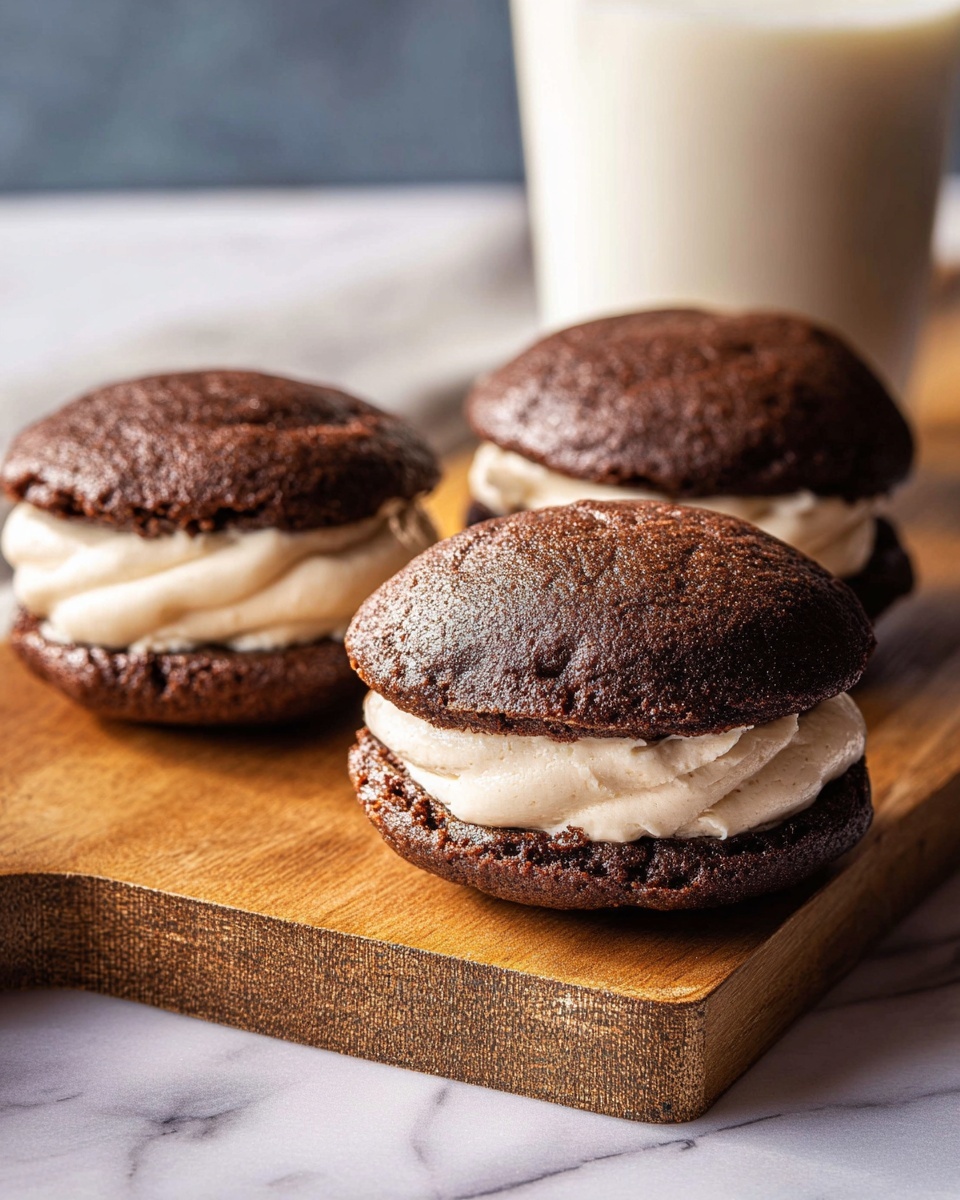
When I serve these whoopie pies, I love to keep things simple so the flavors shine bright. They pair beautifully with a cold glass of milk or a rich coffee, letting the chocolate and cookie dough filling really take center stage. For a party, I’ve found that placing them on a rustic wooden board with fresh berries or mint leaves gives an inviting, casual vibe that guests adore.
I often garnish the tops with a light dusting of powdered sugar or a drizzle of melted chocolate to elevate presentation, especially for festive gatherings. Serving these at room temperature is my favorite because the cakes are soft and the filling is creamy but not overly runny. However, chilling them briefly in warmer months helps maintain firmness and is a refreshing twist.
These treats are perfect for lots of occasions: family dinners, holiday dessert tables, picnic packs, or even as a sweet surprise for weekday afternoons. I recommend portioning them as individual bites, about two tablespoons of filling per pie, so everyone can sneak a delicious portion without overindulging. Trust me, they’re impossible to resist!
Variations
I love experimenting with this Cookie Dough Whoopie Pies: Easy & Delicious Chocolate Filled Treats Recipe to put my own spin on it. For instance, if you want a gluten-free version, simply swap the all-purpose flour with a good gluten-free blend that includes xanthan gum for similar texture. I’ve found this works beautifully without compromising softness or flavor.
For dairy-free or vegan adaptations, try substituting butter with plant-based margarine and milk with almond or oat milk. You can also use flax eggs or a commercial egg replacer for the cake batter. I usually add a bit more vanilla to boost flavor since some replacements mute the richness slightly.
Flavor-wise, you can mix things up by adding a pinch of cinnamon or cayenne to the cake batter for a subtle warmth or experiment with different mix-ins such as white chocolate chips or crushed nuts in the cookie dough filling. If you’re pressed for time, you could even try a no-bake filling alternative like mascarpone sweetened with honey and mini chocolate chips to skip that baking step.
Storage and Reheating
Storing Leftovers
Once assembled, I store these Cookie Dough Whoopie Pies in an airtight container at room temperature to keep the cakes soft and the filling creamy. Properly stored, they stay fresh for up to 3 days. I recommend separating layers with parchment paper if stacked to prevent sticking. Avoid refrigeration as it can dry out the cakes unless you live in a very warm climate where chilling prevents the filling from softening too much.
Freezing
These whoopie pies freeze well if you want to prepare ahead. I like to wrap each assembled pie individually in plastic wrap, then place them in a freezer-safe container or bag. They keep nicely for about 1 month. When you’re ready to enjoy, thaw wrapped in the fridge overnight to maintain moisture and let them come to room temperature before serving.
Reheating
Reheating isn’t usually necessary because these treats are best enjoyed fresh or at room temperature. But if you want to warm them slightly, I recommend a few seconds in the microwave on low power, just enough to soften without melting the filling too much. Avoid prolonged heating or oven reheating as it can dry out the cakes and cause the filling to lose its creamy texture.
FAQs
Can I make these whoopie pies ahead of time?
Absolutely! You can bake the chocolate cakes a day or two in advance and store them in an airtight container. The cookie dough filling can also be made ahead and kept refrigerated. Assemble the pies right before serving to ensure the cakes stay moist and the filling remains creamy.
Is the cookie dough filling safe to eat without eggs?
Yes! This recipe uses an eggless cookie dough filling, which means it’s safe to enjoy raw without any risk from raw eggs. The flour is mixed in as is common for edible cookie dough recipes, and you can also toast the flour lightly if you want extra safety and flavor.
Can I use regular chocolate chips instead of mini chips?
You can, but mini chocolate chips distribute more evenly throughout the filling and provide a better bite-size texture. If using regular chips, consider chopping them slightly smaller to maintain balanced proportions in every bite.
What if I don’t have buttermilk for the cakes?
No problem! You can make a quick buttermilk substitute by adding 1 tablespoon of lemon juice or vinegar to 1 cup of milk and letting it sit for 5 minutes before using. This adds the necessary acidity for tender cakes.
How long will these whoopie pies keep fresh at room temperature?
Stored well in an airtight container, these whoopie pies stay fresh for up to 3 days at room temperature. After that, I recommend freezing any leftovers to maintain flavor and texture.
Conclusion
I can’t recommend this Cookie Dough Whoopie Pies: Easy & Delicious Chocolate Filled Treats Recipe enough for anyone craving a playful yet deeply satisfying dessert. It’s one of those recipes that’s easy to make, impressive to serve, and impossible to resist. Trust me, once you’ve experienced the combination of chocolatey cake and creamy cookie dough filling, you’ll want to make it again and again just like I do. Go ahead, treat yourself and share the joy!
PrintCookie Dough Whoopie Pies: Easy & Delicious Chocolate Filled Treats Recipe
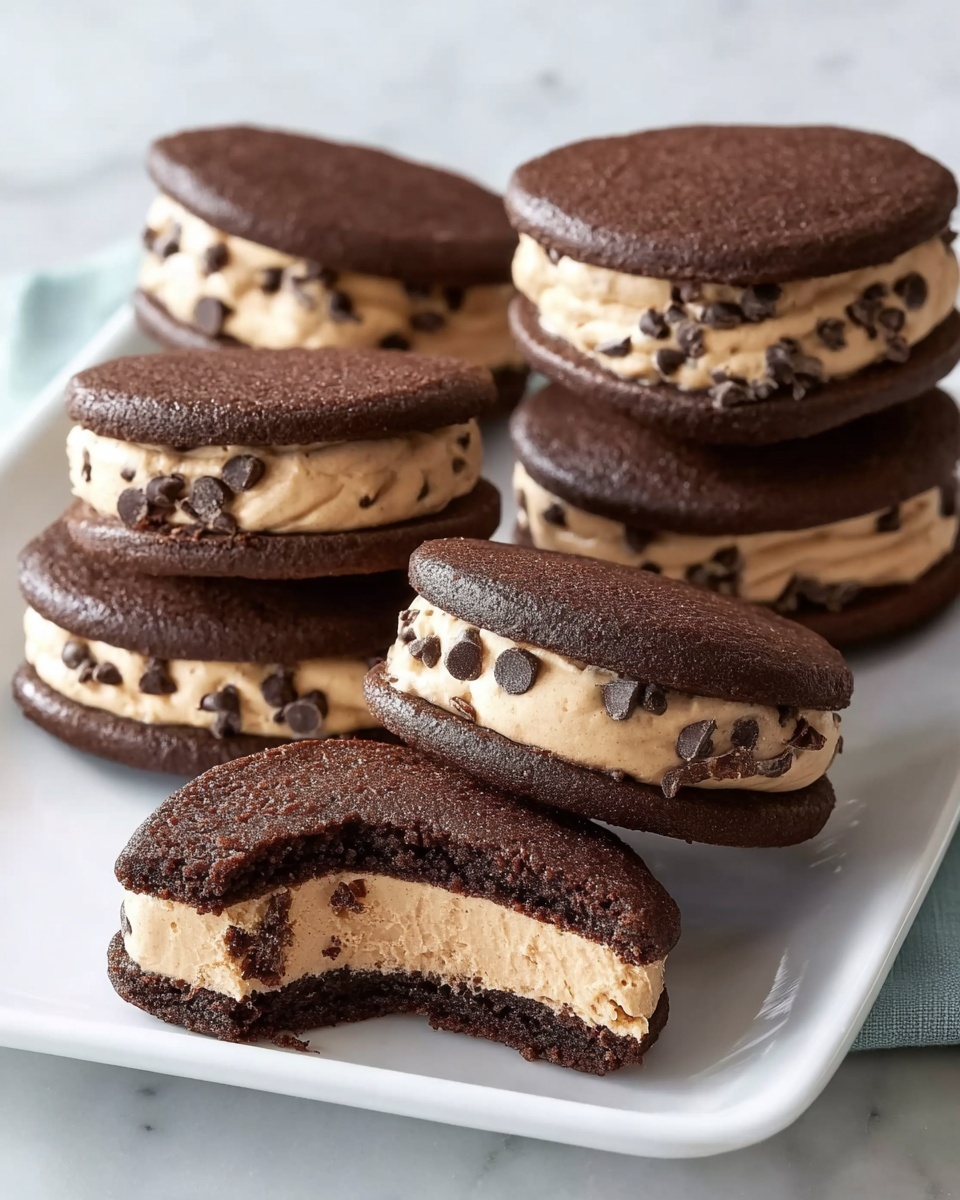
These Cookie Dough Whoopie Pies combine moist, rich chocolate whoopie cakes with a creamy, eggless cookie dough filling studded with mini chocolate chips. Easy to make and perfect for dessert lovers, these homemade treats are soft, indulgent, and sure to please at any gathering.
- Prep Time: 20 minutes
- Cook Time: 8 minutes per batch
- Total Time: 1 hour
- Yield: Approximately 24 whoopie pies
- Category: Dessert
- Method: Baking
- Cuisine: American
Ingredients
For the Chocolate Whoopie Cakes
- 3.5 cups all-purpose flour
- 1.5 cups unsweetened cocoa powder
- 1 tablespoon baking soda
- 1 teaspoon salt
- 1 cup unsalted butter (2 sticks), room temperature
- 2 cups granulated sugar
- 2 large eggs
- 2 cups buttermilk, room temperature
- 2 teaspoons pure vanilla extract
For the Eggless Cookie Dough Filling
- 1 cup unsalted butter (2 sticks), room temperature
- 1 cup light brown sugar, packed
- 0.25 cup granulated sugar
- 0.375 cup milk
- 2 teaspoons vanilla extract
- 2 cups all-purpose flour
- 1 cup mini chocolate chips
Instructions
- Get Ready: Preheat your oven to 400°F (200°C). Line two baking sheets with parchment paper or silicone mats to prevent spreading and ensure perfectly round whoopie pies.
- Dry Mix: In a large bowl, whisk together the flour, cocoa powder, baking soda, and salt. Set aside for later use.
- Cream It: Using a stand mixer, beat the room-temperature butter with both sugars on medium-high speed until light and fluffy, about 3 minutes.
- Add Wet Ingredients: Add the eggs one at a time, beating thoroughly after each addition. Then mix in the buttermilk and vanilla extract until everything is smoothly combined.
- Combine All: Gradually add the dry flour mixture into the wet ingredients on low speed, mixing just until combined. Scrape down the bowl to make sure no dry flour remains.
- Scoop & Bake: Using a 1.5 tablespoon cookie scoop, drop about 12 rounds of batter evenly spaced on each prepared baking sheet.
- Perfect Pies: Bake in the preheated oven for about 8 minutes, rotating the sheets halfway through baking. The tops should be gently set and soft to the touch.
- Cool Down: Allow the whoopie cakes to cool on the baking sheets for 10 minutes, then transfer to a wire rack to cool completely. Repeat if needed, letting baking sheets cool between batches.
- Cream Butter & Sugar (Filling): Beat the room-temperature butter and both sugars in a stand mixer for about 3 minutes until light and fluffy.
- Flavor Boost (Filling): Mix in the milk and vanilla extract until well combined.
- Add Flour (Filling): Slowly add the flour on medium speed until smooth and well blended. If the filling seems too thick to pipe, add 1-2 extra tablespoons of milk.
- Chocolatey Finish (Filling): Gently fold in the mini chocolate chips to complete the eggless cookie dough filling.
- Match & Fill: Once the cakes are completely cool, pair similar-sized halves. Scoop about 2 tablespoons of cookie dough filling onto the flat side of one half. Using a piping bag is recommended for ease.
- Assemble: Place another cake half on top of the filling and press lightly to form a whoopie pie sandwich.
- Enjoy or Store: These whoopie pies are best enjoyed fresh within 3 days. Store in an airtight container at room temperature.
Notes
- These homemade treats are best enjoyed fresh within 3 days.
- Store whoopie pies in an airtight container at room temperature to maintain freshness.
- If the cookie dough filling is too thick, add 1-2 tablespoons of milk to achieve piping consistency.
- Using parchment paper or silicone baking mats prevents spreading and ensures round cakes.
- Allow baking sheets to cool between batches for consistent baking results.