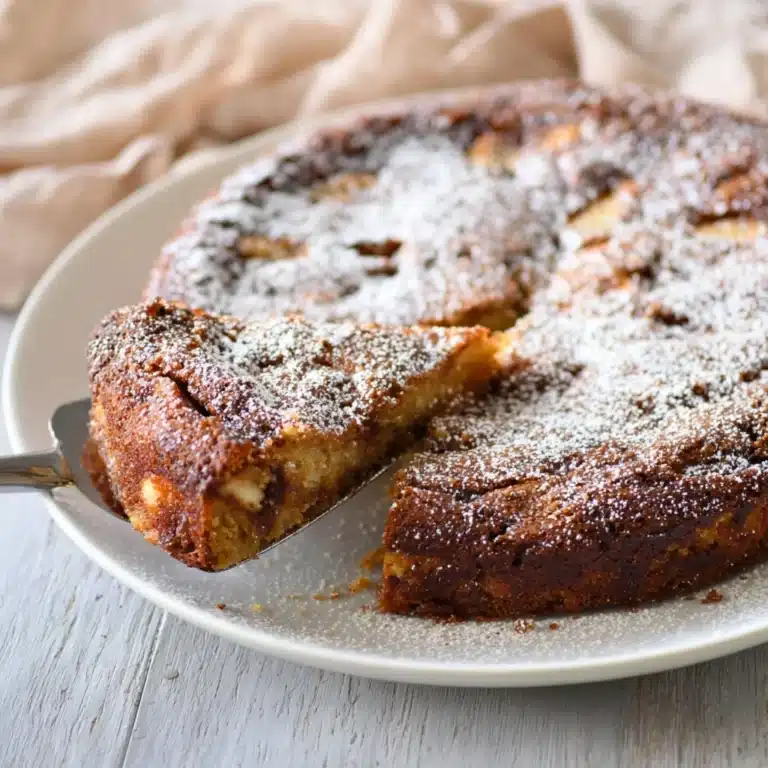
“`html
If you’re on the hunt for a delightful treat that’s both charming and utterly delicious, this Jam Thumbprint Cookies Recipe is the perfect choice to brighten up any snack time or celebration. These little bursts of buttery goodness with vibrant dollops of fruit jam in the center are nostalgic, comforting, and surprisingly easy to make—each bite melts in your mouth, revealing a perfect balance of soft cookie and sweet, tangy preserves. Trust me, once you try this Jam Thumbprint Cookies Recipe, you’ll find it impossible to stop at just one!
Ingredients You’ll Need

Every ingredient in this recipe plays a key role in creating those tender, melt-in-your-mouth cookies with that signature jam-filled center. You’ll find this list simple but essential, perfectly balanced to bring flavor, texture, and beauty to each bite.
- Unsalted butter (1 cup / 225 g): Softened for creamy richness and a tender crumb that’s just right.
- Powdered sugar (¾ cup / 90 g): Adds sweetness and a smooth texture, helping the dough come together beautifully.
- Granulated sugar (½ cup / 100 g): Contributes subtle crunch and helps the cookie edges stay crisp.
- Large egg (1): Binds everything together and adds a lovely golden hue.
- Vanilla extract (2 teaspoons): Enhances the butter’s natural flavor and adds warmth.
- All-purpose flour (2 ¾ cups / 350 g): The sturdy foundation for the dough, creating structure without toughness.
- Salt (½ teaspoon): Balances sweetness and intensifies all the other flavors.
- Apricot jam (¼ cup / 85 g): Provides a sunny, fruity pop that pairs perfectly with buttery dough.
- Raspberry jam (¼ cup / 85 g): Offers a bright, tangy contrast that makes these cookies pop visually and flavor-wise.
How to Make Jam Thumbprint Cookies Recipe
Step 1: Prepare Your Oven and Baking Sheet
Start by preheating your oven to 350°F (180°C) or 160°C if you’re using a fan oven. Line a cookie sheet with parchment paper or a silicone baking mat so your cookies bake evenly and slide off easily without sticking.
Step 2: Cream the Butter and Sugars
In a large bowl, use a hand mixer to cream together the softened unsalted butter, powdered sugar, and granulated sugar. This should take around 2 to 3 minutes until the mixture is wonderfully smooth and creamy. This step is where the magic begins—air whipped into the butter creates that tender crumb we want in the final cookie.
Step 3: Add the Egg and Vanilla
Next, crack in the egg and pour the vanilla extract. Mix again until the batter is light, fluffy, and fragrant with that irresistible vanilla aroma. This step ensures your cookies have both moisture and flavor depth.
Step 4: Incorporate the Dry Ingredients
Slowly add the all-purpose flour and salt, blending until just combined. It’s important not to overmix here because you want tender cookies, not tough ones. The dough should come together into a smooth ball, ready for shaping.
Step 5: Shape and Create the Thumbprints
Take about 1 tablespoon of dough and roll it between your palms into a smooth ball without cracks—warm hands help keep the dough pliable. Place each ball on your lined baking sheet about 2 inches apart. Then, using the back of a teaspoon (wet it slightly so it doesn’t stick), gently press into the center of each ball to create a little well. Doing this immediately after rolling keeps the dough from cracking as it bakes.
Step 6: Fill with Jam
Give both your apricot and raspberry jams a good stir to loosen them up but keep them separate. Now spoon a generous teaspoon of jam into each depression—feel free to alternate or mix them up on the tray for a colorful variety that will impress everyone.
Step 7: Bake the Cookies
Pop your tray into the preheated oven and bake for 10 to 12 minutes. The cookies should still stay quite pale and not golden; this subtle color shows they are perfectly set but still tender inside. Remove from the oven and let cool on the pan for 5 to 10 minutes before transferring to a wire rack to cool completely.
How to Serve Jam Thumbprint Cookies Recipe

Garnishes
Though these jam thumbprints are already stunning on their own, a light dusting of powdered sugar just before serving adds an extra touch of prettiness and a delicate sweetness that enhances each bite. Fresh mint leaves or edible flowers arranged alongside can also elevate their visual appeal for special occasions.
Side Dishes
These cookies pair wonderfully with a simple cup of tea, coffee, or even a glass of cold milk. For a dessert plate, consider serving them with a scoop of vanilla ice cream or a drizzle of melted chocolate to create an indulgent treat everyone will love.
Creative Ways to Present
Make your Jam Thumbprint Cookies Recipe truly stand out by arranging them on tiered platters for parties or gift-wrapping a few in cellophane tied with colorful ribbons for sweet handmade presents. Alternatively, try using different jam flavors for a rainbow assortment or dipping half the cookie in white or dark chocolate for an extra fancy twist.
Make Ahead and Storage
Storing Leftovers
Once your cookies have completely cooled, store them in an airtight container at room temperature. They will stay fresh and delicious for up to 6 days, making them perfect for prepping ahead of parties or for a daily dose of homemade goodness.
Freezing
If you want to enjoy these treats later, the cookie dough itself freezes beautifully for up to 3 months—shape the dough balls and freeze them on a baking sheet before transferring to a freezer bag. Alternatively, baked cookies can be frozen in an airtight container to keep their flavor intact; just thaw them out at room temperature before serving.
Reheating
To bring your thumbprint cookies back to just-baked freshness, pop them in a warm oven for a few minutes or microwave briefly. This gentle warm-up revives the buttery softness and makes the jam center extra inviting.
FAQs
Can I use any type of jam for this Jam Thumbprint Cookies Recipe?
Absolutely! One of the best parts of this recipe is its versatility—any jam or fruit preserve you love can be used. Feel free to experiment with flavors like strawberry, blueberry, or even fig for delicious variety.
How do I prevent the dough from cracking when making thumbprint cookies?
The key is to press the indentation while the dough balls are still soft and warm from rolling. If you wait too long or make all the balls first, the cookies are more likely to crack. Wetting your fingers or the back of your spoon also helps create smooth wells without breaking the dough.
Can I make the dough in advance?
Yes! The dough keeps well refrigerated for up to 2 days and can be frozen for up to 3 months. Just thaw before shaping and baking as usual.
Why do my cookies turn out flat or spread too much?
Make sure your butter is softened but not melted, and don’t overwork the dough once you add the flour. Overmixing activates too much gluten, causing spreading. Also, chilling the dough briefly before baking can help maintain shape if needed.
What is the best way to store these cookies to keep them fresh?
Store Jam Thumbprint Cookies in an airtight container at room temperature away from heat or humidity. Avoid stacking them when still warm to prevent sticking. They keep fresh and tasty for about 6 days.
Final Thoughts
There’s just something so heartwarming and satisfying about making and sharing the Jam Thumbprint Cookies Recipe. This easy, colorful batch truly feels like a little love baked into every bite. Whether for gifting, a special occasion, or an everyday treat, these cookies never fail to bring smiles and happy memories. Go ahead, grab your mixing bowl, and make some magic happen in your kitchen!
“`
PrintJam Thumbprint Cookies Recipe

These classic Jam Thumbprint Cookies feature a tender, buttery base with a sweet dollop of apricot or raspberry jam in the center. Perfectly light and delicate, they are an irresistible treat for any occasion, combining simple ingredients into a delightful, timeless cookie.
- Prep Time: 15 minutes
- Cook Time: 10-12 minutes
- Total Time: 25-27 minutes
- Yield: About 24 cookies
- Category: Dessert
- Method: Baking
- Cuisine: American
Ingredients
Cookie Dough
- 1 cup (225 g) unsalted butter, softened
- ¾ cup (90 g) powdered sugar
- ½ cup (100 g) granulated sugar
- 1 large egg
- 2 teaspoons vanilla extract
- 2 ¾ cups (350 g) all-purpose flour
- ½ teaspoon salt
Fillings
- ¼ cup (85 g) apricot jam or preserves
- ¼ cup (85 g) raspberry jam or preserves
Instructions
- Preheat Oven and Prepare Baking Sheet: Preheat your oven to 350°F (180°C) or 160°C for fan ovens. Line a cookie sheet with parchment paper or a silicone baking mat to prevent sticking and ensure even baking.
- Cream Butter and Sugars: In a large mixing bowl, use a hand mixer to cream together the softened unsalted butter, powdered sugar, and granulated sugar until the mixture is smooth and creamy, about 2-3 minutes.
- Add Egg and Vanilla: Incorporate the egg and vanilla extract into the creamed butter and sugar mixture. Mix thoroughly until the batter is light and fluffy.
- Combine Dry Ingredients: Add the all-purpose flour and salt to the wet ingredients. Mix just until combined without overworking the dough to keep cookies tender.
- Form Cookie Balls: Using a tablespoon-sized scoop, roll the dough into smooth balls between your palms without cracks. Place each ball on the prepared baking sheet about 2 inches apart.
- Create Thumbprints: Immediately press the back of a round teaspoon into the center of each dough ball to form a small well. Wetting the spoon with water before pressing will help prevent sticking.
- Fill with Jam: Stir the apricot and raspberry jams individually to loosen them. Fill each indent with a mounding teaspoon of your chosen jam, keeping the flavors separate.
- Bake the Cookies: Bake the cookies in the preheated oven for 10-12 minutes, or until the cookies are set but remain very light in color and not golden. Avoid overbaking to keep them tender.
- Cool: Remove the cookies from the oven and allow them to cool on the baking sheet for 5-10 minutes before transferring them to a wire rack to cool completely.
- Storage: Once completely cooled, store the cookies in an airtight container at room temperature. They will stay fresh for up to 6 days.
Notes
- Create the thumbprint indent immediately after rolling each dough ball while still warm and soft from your hands to avoid cracking during baking.
- If the dough sticks to your hands, wet your hands slightly to help with rolling.
- For added texture and presentation, roll dough balls in plain or colored sugar before making the indent.
- You can substitute any jam or fruit spread you prefer for the fillings.
- The dough can be prepared in advance and stored in the refrigerator for up to 2 days or frozen for up to 3 months.
- Store baked cookies in an airtight container at room temperature to maintain freshness for up to 6 days.