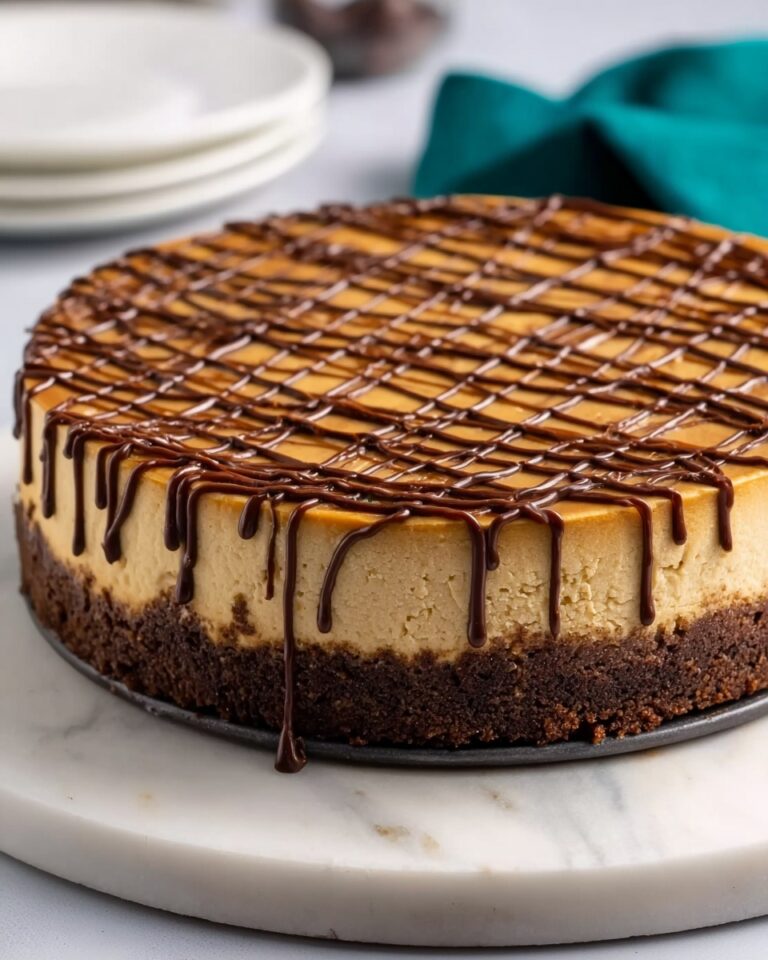
I absolutely adore this No Bake Biscoff Cheesecake Recipe because it perfectly captures that rich, caramelized, spiced flavor of Biscoff cookies and spread in a luscious, creamy cheesecake that requires no oven at all. It’s one of those desserts I’m so excited to share because it combines ease with indulgence, making it ideal for those moments when I want to impress without stress. The smooth filling with a buttery Biscoff crust is just irresistible, and every bite invites me back for more.
Why You’ll Love This No Bake Biscoff Cheesecake Recipe
I love how this cheesecake strikes the perfect balance between being decadently flavorful and incredibly simple to prepare. The Biscoff cookies give the crust a wonderfully spiced crunch, while the creamy filling melds that deep caramel essence with a light, velvety texture that melts in your mouth. It’s sweet but not overwhelming, and the touch of sour cream gives it just enough tang to cut through the richness. Honestly, it’s a flavor profile that always feels cozy yet elevated.
For me, the magic also lies in how effortlessly it comes together. Without any baking involved, this recipe saves so much time and avoids oven trouble, which is great when I want a crowd-pleaser but also need a bit of convenience. Plus, the cheesecake needs time to chill and set, meaning I can prepare it in advance for parties, holiday dinners, or even a casual weekend treat. It’s definitely one of those standout recipes that gets rave reviews every time I bring it out.
Ingredients You’ll Need

The ingredients for this cheesecake are simple, familiar, and each one plays a vital role in creating the perfect flavor, texture, and appearance. From the crumbly Biscoff cookie base to the creamy filling, everything combines to deliver that dreamy cheesecake experience without fuss.
- Biscoff cookies: These bring the signature caramelized and spiced crunch you want in both the crust and garnish.
- Butter (melted): It binds the crust crumbs together and adds richness for that buttery flavor.
- Cream cheese (room temp): The creamy foundation of the cheesecake filling, smooth and tangy.
- Powdered sugar: Sweetens the filling evenly and dissolves quickly for no grainy texture.
- Instant pudding mix: Helps the filling set firmly and adds a subtle creamy sweetness.
- Vanilla extract: Adds warmth and depth to enhance all the flavors.
- Heavy cream (cold): Whipped into the filling to give it that light, airy lift.
- Sour cream: Adds a gentle tang and creaminess that balances sweetness beautifully.
- Biscoff spread: The star ingredient for that gooey, spiced caramel flavor woven into the filling and topping.
- Biscoff cookies (for garnish): Adds texture and a pretty crunch to finish.
Directions
Step 1: Prepare the crust by pulsing the Biscoff cookies in a food processor until you achieve fine crumbs. If you don’t have a food processor, no worries—place the cookies in a zip-top bag and crush them using a rolling pin until finely ground.
Step 2: In a mixing bowl, stir the cookie crumbs with the melted butter until each crumb is evenly coated. Press this mixture firmly into the bottom of your 9-inch pan. Pop it in the freezer to firm up while you move on to the filling.
Step 3: For the filling, beat together the room temperature cream cheese, powdered sugar, vanilla extract, and instant pudding mix using an electric mixer. Continue until the mixture is smooth and creamy, free from lumps.
Step 4: Add the Biscoff spread and sour cream to the bowl. Mix on medium speed until everything is fully blended and no streaks remain.
Step 5: Pour in the cold heavy cream and whip the mixture until it thickens and holds its shape. The filling should be sturdy enough to stand on its own without collapsing.
Step 6: Pour the luscious filling over the chilled crust, smoothing the surface with a spatula. Cover the cheesecake and refrigerate it for at least 5 hours or overnight so it sets completely.
Step 7: Once set, carefully release the cheesecake from the pan. Melt additional Biscoff spread until it’s just pourable—safe to do this in 15-second bursts in the microwave so it doesn’t get too hot. Spread this topping evenly across the cheesecake with an offset spatula.
Step 8: Garnish the edges with crushed Biscoff cookies for an extra layer of crunch and visual appeal. When serving, use a sharp knife dipped in hot water and wiped dry before each cut to get clean, professional-looking slices. Serve chilled and enjoy every bite!
Servings and Timing
This recipe serves about 8 generous slices, perfect for sharing with friends and family. The prep time is roughly 20 minutes, and since this is a no-bake dessert, there is no cook time. However, you’ll want to allow at least 5 hours of chilling time in the refrigerator for the cheesecake to set properly—overnight is ideal if you can plan ahead. In total, from start to ready-to-serve, budget about 5 hours and 20 minutes.
How to Serve This No Bake Biscoff Cheesecake Recipe

When serving this cheesecake, I love keeping it simple and elegant. Serving it chilled straight from the fridge preserves that perfect creamy texture and lets the layers stay firm and luscious. I usually plate it on a clean white dish to let the caramel hues of the Biscoff topping pop visually. A few crushed Biscoff cookie bits sprinkled artfully add texture and complete the look.
This dessert pairs beautifully with fresh berries or a fruit coulis if you want a pop of brightness to contrast the sweet, spiced flavor. For something indulgent, a drizzle of warm caramel or a scoop of vanilla bean ice cream alongside elevates the whole experience. When it comes to beverages, I find that a glass of chilled sparkling wine or a slightly sweet white like Riesling complements the spiced caramel tones perfectly. For a cozy night in, a cup of robust coffee or chai tea brings out the warmth of the Biscoff beautifully.
This cheesecake is ideal for family dinners, holiday celebrations, or special occasions where you want to impress without fuss. Because it’s so rich, I tend to serve slightly smaller slices—about one-eighth of the cake—paired with light accompaniments to keep everything balanced. Whether you’re hosting a casual gathering or a festive feast, it always steals the spotlight.
Variations
I love experimenting with this No Bake Biscoff Cheesecake Recipe to suit different tastes or dietary needs. For example, you can switch out the heavy cream for coconut cream to add a subtle tropical sweetness and make it dairy-free, though the texture will be a little different. Using a gluten-free cookie alternative instead of classic Biscoff keeps the crust crumbly and flavorful but makes the dessert gluten-free friendly.
For a flavor twist, I sometimes fold in some chopped toasted pecans or walnuts into the crust for extra crunch and a nutty depth. Another idea I adore is adding a layer of melted dark chocolate over the Biscoff spread topping—allow it to set for a rich contrast that’s simply fantastic. You could also transform this into mini cheesecakes by dividing the filling and crust into cupcake liners, perfect for easy portion control and party trays.
While this is a no-bake recipe by nature, you could experiment by baking the crust briefly (about 8 minutes at 350°F) before chilling if you prefer a firmer base. Just be sure to let it cool completely before adding the filling. These variations keep the core of the recipe intact but allow flexibility for your own creative spin.
Storage and Reheating
Storing Leftovers
After enjoying your cheesecake, any leftovers should be stored in an airtight container or properly wrapped with plastic wrap to prevent drying out or absorbing fridge odors. I keep mine refrigerated, where it stays fresh and creamy for up to 4 days. Always ensure it’s covered well to protect the delicate topping and keep it tasting like fresh.
Freezing
This cheesecake freezes beautifully if you want to make it ahead or save portions for later. I usually wrap the whole cake tightly with plastic wrap and then a layer of aluminum foil to prevent freezer burn. You can also freeze individual slices wrapped similarly. It can be stored frozen for up to 2 months. When you’re ready to enjoy, thaw it in the refrigerator overnight for best results, avoiding any texture changes caused by quick thawing.
Reheating
Since this is a no bake, chilled cheesecake, I don’t recommend reheating it in any way. The creamy texture and whipped cream component are best served cold. If the cheesecake is a bit firm from the fridge or freezer, I simply let it sit at room temperature for 10 to 15 minutes before serving, which softens it slightly and enhances the flavors.
FAQs
Can I use other cookies besides Biscoff for the crust?
Absolutely! While Biscoff cookies provide that unique caramelized spice flavor, you can substitute with graham crackers, digestive biscuits, or gluten-free cookies if needed. Just keep in mind the flavor will shift slightly, so pick a cookie with complementary spices or sweetness.
Do I really need instant pudding in the filling?
The instant pudding mix helps the cheesecake firm up without baking and adds a smooth texture. You could try omitting it or replacing it with gelatin, but the texture might be less creamy or a bit softer. I find the pudding mix gives reliable, consistent results.
Can I make this cheesecake vegan?
Making this vegan would require several adjustments, like using vegan cream cheese, coconut cream instead of heavy cream, and a vegan Biscoff-style spread or homemade spiced cookie spread. It’s doable but takes some experimentation. I recommend starting with small batches to test textures and flavor.
How do I avoid lumps in the cheesecake filling?
Make sure your cream cheese is fully softened to room temperature before mixing. Beat it well first before adding other ingredients. Also, ensure to whip the heavy cream thoroughly but gently fold it in carefully to keep the filling smooth and airy.
What’s the best way to get clean slices when serving?
For beautiful slices, dip a sharp knife in hot water, wipe it dry, then cut through the cheesecake with a clean blade. Repeat dipping and wiping before each slice to prevent sticking and jagged edges. This little trick makes your cheesecake look professionally sliced every time.
Conclusion
I can’t recommend this No Bake Biscoff Cheesecake Recipe enough for anyone who loves that cozy, rich Biscoff flavor wrapped in something creamy and dreamy. It’s fun to make, perfect for chilling out when you want an effortless yet stunning dessert, and absolutely delicious every single time. Trust me, once you try it, it will become a go-to favorite in your dessert rotation.
PrintNo Bake Biscoff Cheesecake Recipe

This No Bake Biscoff Cheesecake combines the rich, caramelized flavor of Biscoff cookies and spread with a creamy, smooth cheesecake filling for an indulgent dessert that requires no oven. The crust is made from crushed Biscoff cookies mixed with melted butter, and the luscious filling features cream cheese, powdered sugar, instant pudding, sour cream, and whipped heavy cream. Topped with melted Biscoff spread and garnished with crushed cookies, this cheesecake offers a crunchy and creamy texture contrast perfect for any occasion.
- Prep Time: 20 minutes
- Cook Time: 0 minutes
- Total Time: 5 hours 20 minutes
- Yield: 8 servings
- Category: Dessert
- Method: No-Cook
- Cuisine: American
- Diet: Vegetarian
Ingredients
Crust
- 2 cups Biscoff cookies
- 1/2 cup Butter (melted)
Filling
- 16.35 oz Cream cheese (room temperature)
- 1 cup Powder sugar
- 2 tbsp Instant pudding mix
- 1 tsp Vanilla extract
- 1 1/4 cups Heavy cream (cold)
- 1/3 cup Sour cream
- 1/2 cup Biscoff spread
Topping
- 4 Biscoff cookies (for garnish)
- 1/3 cup Biscoff spread (melted for topping)
Instructions
- Prepare the Crust: Pulse the Biscoff cookies in a food processor until fine crumbs form, or crush them in a zip-top bag with a rolling pin. In a mixing bowl, combine the crumbs with melted butter, stirring until evenly coated. Firmly press the mixture into the bottom of a prepared 9-inch springform pan or similar. Place the pan in the freezer to firm up while preparing the filling.
- Make the Filling: In a large bowl, beat the room-temperature cream cheese, powdered sugar, vanilla extract, and instant pudding mix with an electric mixer until smooth and creamy with no lumps. Add the Biscoff spread and sour cream, mixing on medium speed until fully combined and no streaks remain.
- Whip the Cream: Pour the cold heavy cream into the bowl, whipping the mixture until it becomes thick, stiff, and able to hold its shape. The filling should be sturdy enough to stand on its own.
- Assemble the Cheesecake: Pour the filling over the chilled crust and smooth the top evenly with a spatula. Cover the pan and refrigerate for at least 5 hours, preferably overnight, until the cheesecake is fully set.
- Add the Topping and Garnish: Once set, gently release the cheesecake from the pan. Melt the additional Biscoff spread in 15-second intervals until pourable but not hot, then spread it evenly over the top using an offset spatula. Garnish the edges with crushed Biscoff cookies for extra texture and presentation.
- Slice and Serve: For clean, professional slices, dip a sharp knife into hot water and wipe it dry before each cut. Serve chilled and enjoy the creamy, spiced sweetness of this no-bake Biscoff cheesecake.
Notes
- Temperature is Key: Ensure your cream cheese is completely at room temperature before mixing to avoid lumps, and keep heavy cream ice-cold for optimal whipping volume.
- Don’t Over-Melt the Topping: Heat Biscoff spread in short 15-second bursts until pourable but not hot to prevent melting the cheesecake layer underneath.
- The “Double-Lined” Secret: Line the bottom of your springform pan with parchment paper and lightly grease the sides for easy removal.
- Achieve Professional Slices: Dip a sharp knife in hot water, wipe dry, and repeat between slices to get clean, bakery-style edges.